Showing posts with label Recipes. Show all posts

Wednesday, June 29, 2016

Blueberry & Lemon Breakfast Quinoa Bowl {An easy on the go breakfast!}

Healthy Breakfast
Trying to get out of the house in the morning with a toddler can be a challenge. By the time I get Aiden ready some mornings, I have to grab my breakfast to go and run out the door. So when I found this recipe for a healthy breakfast that I could make and take, I had to try it and I'm so glad I did. Nuby's Insulated Stainless Steel Food Jar helps to keep my breakfast piping hot until I'm ready to eat it. It holds 15 ounces and has a folding spoon in the lid. Since it is stainless steel it keeps foods warm, but is cool to the touch. This has been a lifesaver for on the go breakfasts. I have also taken several of Aiden's meals in it when I pack meals for on the go. (Great for yogurt, cut up fruit, mac and cheese, cottage cheese, etc.)
Healthy Breakfast
Ingredients:
1 cup Quinoa (rinsed)
2 cups milk
1/2 cup lemon zest
3 Tablespoons Maple syrup
1 cup blueberries
2 tsp. flaxseed meal
1 pinch salt

Instructions:
1. Rinse quinoa in fine strainer with cold water until water runs clear
2. Heat milk i a saucepan over medium heat until warm
3. Stir quinoa and salt into the milk
4. Cover and simmer over medium-low heat for about 20 minutes (there should still be liquid in quinoa after allotted time so it is an oatmeal like consistency)
5. Remove saucepan from heat and stir in maple syrup, lemon zest.
6. Fold in blueberries and flaxseed meal and top with extra lemon zest
7. Serve warm

*I was given this product for free in exchange for an honest review. All opinions are my own.

Monday, June 13, 2016

3 Easy Toddler Popsicle Recipes

Baby Popsicles
Thank goodness for summertime! My little guy loves being outside and it's always fun to take a break to cool off with a popsicle (especially for those teething kiddos, can I get an Amen?) Here are 3 tried and true kid approved popsicle "recipes" that you can whip up and throw in the freezer in less than 5 minutes!

1. Coconut Water + Fruit Popsicle: 

Ingredients: 1 small container of coconut water (I used Vita Coco) and chopped fruit. I used blueberries, strawberries and grapes. I also recommend using the Nuby Popsicle molds, but any popsicle mold will work!

Instructions: Chop up fruit into small pieces and put on the bottom of popsicle molds
Baby Popsicles
Pour Coconut water on top until popsicle mold is filled.
Baby Popsicles
Add handles of popsicles and put in freezer for 24 hours or until completely frozen.
Easy kid popsicles

2. Pouch Popsicles

Ingredients: Your child's favorite flavor of pouch. Aiden loves Ella's Kitchen pouches. We used the Apples and Strawberries  flavor to make ours.

Instructions: Open selected pouch, pour into popsicle molds and freeze. One pouch fits perfectly into the Nuby Popsicle molds with a sip or two to spare. These are almost too easy and are guaranteed to be a hit since you are using your child's favorite pouch flavors.
pouch popsicles

3. Mashed Fruit + Yogurt Popsicles

Ingredients: Your child's favorite mash-able fruits and 1/2 cup of plain yogurt (or more if using larger popsicle molds).

Instructions: See the recipe for my Toddler's favorite popsicle combination: Avocado + Banana Popsicles by clicking here and modify by substituting your child's favorite fruits!
Do you have any easy popsicle recipes that your kids enjoy?

Monday, February 22, 2016

{Baby Approved Meals} Sweet Potato + Lentil Puffs

I have had so much fun planning and pinning meals for Aiden to eat as he grows. Now that he is a big one year old, he pretty much eats what we eat, but I love sharing recipes that I've made along the way in the hopes that some of you can use them for your little ones too. And if you don't have a little one, these are a healthy and delicious snack for anyone!

Aiden loved these when he was first starting to pick up food on his own and they were easy to pack up and take on the go as a snack. They are baby and Mama approved.

Ingredients:
1 Medium Sweet Potato (peeled + chopped)
1/2 cup Lentils
1/4 cup Frozen Peas
1/2 cup Cheddar Cheese
1 carrot (grated)
1 egg (beaten)
Olive oil

Instructions:
1.) Add lentils and 1 cup of water to a sauce pan and bring to a boil. Simmer until lentils are soft.
2.) Steam the Sweet Potatoes until soft (I used the steam feature on my BEABA Baby Cook)
3.) Add Drained Lentils and Sweet Potatoes to a large bowl and allow to cool.
4.) Add the grated carrot, cheddar cheese and beaten egg to lentil mixture and mix.
5.) Stir in the Frozen Peas.
6.) Preheat oven to 400 degrees then form mixture into small balls/puffs. Place on greased baking sheet.
7.) Brush the tops of the sweet potato puffs with olive oil
8.) Bake approximately 30 minutes, turning the puffs a few times throughout the cooking time to ensure they cook evenly.


Other Baby Approved Meals:
Original recipe found here.

Tuesday, February 9, 2016

Tacos with a twist {Lime & Honey Sweet Potato Tacos Recipe}

For some reason, Sweet potatoes have been a staple item in almost all the recipes I've been cooking lately. (You can see some of the other ones on my Tried & True recipes Pinterest board.) But of all the recipes I've made so far, this one is my new favorite.

Usually when I think of tacos, this Chipotle loving gal thinks of adding steak or chicken. I am also a huge fan of fish tacos. But I found this meatless taco recipe and had to give it a try and man oh man was it a hit! I will be making these again and again and again.

Ingredients:
For prepping the Sweet Potatoes-
1 and 1/2 pounds peeled and chopped Sweet Potatoes cut into 1/2 inch cubes (I used 3 large Sweet Potatoes)
4 Tbsp. Olive Oil (divided)
1 tsp. Cumin
1 tsp. Paprika
1/4 tsp. Ground Coriander
1/4 tsp. Cayenne Pepper
Salt & Pepper (to taste)

Other ingredients to prep while Sweet Potatoes are baking-
1 clove garlic (minced)
1 small yellow onion (chopped) (About 1 cup)
1 14.5 oz. can black beans (rinsed + drained)
1 cup frozen yellow corn (thawed + drained)
3 Tbsp. Honey
3 Tbsp. Fresh Juice (1 lime)
2 Tbsp. Cilantro (chopped)
Corn Tortillas

Toppings-
Feta cheese (this is a MUST!)
Romaine Lettuce
Salsa
Diced Avocados

Instructions:
1.) Preheat oven to 425 degrees. Peel and chop up Sweet Potatoes into 1/2 cubes.
2.) Place Sweet Potato cubes onto a foil lined baking sheet and drizzle evenly with 3 Tbsp. of the Olive Oil. Toss to coat.
3.) Add Cumin, Paprika, Ground Coriander, Cayenne Pepper and Salt and Pepper. Toss.
4.) Place in oven to bake for 20 minutes. Make sure to remove from oven and toss at the 10 minute mark. (Halfway through)
While sweet potatoes are baking...
5.) Add the remaining 1 Tbsp. of Olive oil to a large skillet on Medium Heat
6.) Add the chopped onions and toss. Allow to caramelize (about 5-6 minutes)
7.) Add minced garlic and toss for about 30 seconds then lower heat to medium low
8.) Add black beans, corn, honey and lime juice. Heat until warmed through.
9.) Remove Sweet Potatoes from oven and add to the large skillet.
10.) Add Cilantro and toss all ingredients.
11.) Serve over warm tortillas with your desired toppings. I highly suggest adding the Feta cheese.
So incredibly delicious!

Do you have any other taco recipes with a twist like this one? 
Please share in the comments!

Thursday, December 17, 2015

Candy Cane Cake Balls {Holiday Recipe}

Raise your hand if you are in love with Trader Joe's. Okay. Now raise your hand if you've ever had their seasonal Candy Cane Joe-Joe's. If you haven't had them, they are like Oreos (only better) and they have a peppermint cream filling. De-freaking-licious. So when thinking about a recipe to make for a holiday girl's night in I thought: I want chocolate, but I want festive. Enter Candy Cane Joe-Joe Cake balls. I followed this recipe, but used Candy Cane Joe Joe's instead of Oreos and I love how they turned out! (If you don't have a Trader Joe's near you, you can use Peppermint Oreos instead.) You can find my recipe below. I promise it's easy and the result is amazing.
Ingredients:
36 Candy Cane Joe Joe's (or Peppermint Oreos)
1 package (8oz.) Softened Cream Cheese
4 packages (4 oz.) semi-sweet Baking Chocolate (I used Bakers)
Festive Sprinkles
Instructions:
1.) Place cookies in a large ziplock bag and crush into crumb sized bits. (I used a rolling pin)
2.) Add cookie crumbs to a large bowl and mix in softened cream cheese.
3.) Form into 1 inch balls then place in the freezer for 10 minutes to allow to set up.
4.) While the cookies are firming up in the freezer, melt your chocolate in a microwave safe bowl.
5.) After 10 minutes, dip balls into melted chocolate.
6.) Place on wax paper in a single layer in a dish
7.) Add festive sprinkles
8.) Place in freezer for 30-40 minutes until hardened.
9.) Devour or share with friends. The choice is yours. ;)
*This recipe is best paired with your best girlfriend, The Holiday and wine. Just a suggestion. 

Monday, December 7, 2015

{Baby Approved Meals} Vegetable + Egg + Cheese Orzo

*Disclaimer: My one year old loved this dish on days 1, 3 and 5 but refused to it in on days 2 and 4. Eating is an adventure at this age, just sayin...

Ingredients:
1 cup Orzo
1 cup Frozen peas and carrots
4 eggs
1/4 cup milk
2 Tablespoons Shredded Cheese
1 Tablespoon Butter
Salt & Pepper to taste

Instructions:
1.) Bring a large saucepan of salted water to boil
2.) Add the orzo and cook 3-4 minutes until al dente, stirring occasionally
3.) Add the frozen peas and carrots to the orzo and continue cooking for 2 minutes
4.) Drain veggies and orzo
5.) Whisk the eggs, milk and salt and pepper together in a separate bowl.
6.) Add cheese to egg mixture
7.) Melt butter in a large non-stick skillet over medium heat
8.) Add the drained orzo and veggies to the skillet
9.) Add the egg mixture
10.) Using a rubber spatula, stir until the eggs are set and have coated the orzo/veggie mixture (3-5 minutes)
11.) Serve warm with additional cheese


Recipe adapted from here.
See other {Baby Approved Meals} here and here.

Thursday, November 5, 2015

Candy Corn Popcorn Balls

Halloween Popcorn balls
If you are like me, you bought way too much candy corn and are now trying to figure out what the heck to do with it all besides eat it by the handful. So today I am sharing a fun way to use up all that candy corn!

Ingredients:
Makes 6 popcorn balls
1 bag microwave popcorn
1 bag Kraft Caramels (unwrapped)
1/2 cup candy corn (or more if that's what your heart desires)
2 Tablespoons Water (plus more to wet your  hands before forming popcorn balls)

Instructions:
1.) Pop the popcorn and remove all extra unpopped kernels
2.) Place popcorn in a large bowl
3.) Add candy corn to bowl
4.) Put unwrapped caramels in a medium saucepan, add water and turn on medium heat
5.) Continuously stir caramels so caramel doesn't burn
6.) Once caramel is melted, pour over popcorn
7.) Stir caramel, popcorn and candy corn together until mixed well
*Don't skip this next step...wet hands make all the difference when forming the popcorn into balls!
8.) Lightly dampen your hands with water and then begin forming balls with the popcorn mixture
9.) Add a festive straw to the top of your popcorn ball
10.) Place on wax paper to allow to harden
11.) Eat up! Yum.

Another easy way to use up your candy corn is to make a festive trail mix.
Do you have any other fun ways you use up your halloween candy?

Wednesday, September 2, 2015

{Baby Approved Meals:} Lentil and Brown Rice Soup

One night I was making Lentil Chili for dinner and I started thinking about ways that I could make Lentils for my little guy who was 9 months old at the time. I'm terrible at putting flavors together, but I'm great at following a recipe so I started flipping through a baby cookbook I had bought and found a recipe for Lentil and Brown Rice soup. It was perfect since I already had all the ingredients on hand and Aiden seemed to enjoy it. I secretly loved that we were all eating Lentils together too and thought aw look at our little family of 3 all eating their lentils together around the dinner table. Haha. So here's the recipe and a list of ingredients for you to make this for you or your baby or both!

Ingredients: (Makes about 1 1/2 cups of soup-perfect amount for baby)
2 3/4 cups (22 fluid oz) Low Sodium Vegetable broth (or water)
1/3 cup brown rice
1/2 cup lentils (rinsed)

Instructions:
1.) Bring the vegetable broth to a simmer in a saucepan over medium-high heat
2.) Add the rice and lentils and reduce heat to low
3.) Cover the saucepan and allow to simmer gently until most of the water is absorbed (the rice is tender and lentils are soft) This should take about 30-35 minutes.
4.) Remove from heat and allow to cool slightly
5.) Transfer the lentil-rice mixture to a food processor and puree until desired consistency

Original recipe can be found in this cookbook!

Monday, June 15, 2015

Baby Friendly Popsicles: Avocado & Banana {GIVEAWAY}

Avocado and Banana Popsicles
Now that summer is here I've been trying to come up with some ways to keep Aiden cool on those unbearably hot summer days. I got these Fruitsicle Popsicle Molds to try out and have been coming up with healthy and simple recipes to make into popsicles for Aiden who is 7 months old.

These popsicle molds are the perfect size for creating baby sized popsicles! There are 4 molds and they each hold 1 fluid ounce, which is plenty for a little one who is just starting solid foods! They are easy to fill, the molds snap into place and are easy to remove after the popsicles have been frozen. They are also BPA free and are freezer, dishwasher and microwave safe. You can purchase your own Fruitsicle Popsicle Molds here or enter for a chance to win a set on my Instagram today over here!

What you need to make Avocado & Banana Popsicles...
(Makes 4 large popsicles or 6-8 small ones)
1 banana
1 avocado
1/2 cup Plain Organic Yogurt
Avocado and banana popsicles
I started by peeling a banana and using my Garden Fresh Mash n' Feed to mash the banana until it was smooth. I then cut the avocado in half, removed the pit, scooped out the insides and used the same process to mash it.
Avocado and banana popsicles
After the avocado and banana were mashed, I pureed them with the yogurt. I used my BEABA Babycook, but you could use a blender as well.
avocado and banana popsicles
Once the ingredients were blended and were a smooth consistency I tasted it (yum!) and then poured the mixture into my popsicle molds.
avocado and banana popsicles
After the molds were filled I snapped on the tops and stuck them in the freezer. I left them in the freezer overnight and they were easy to snap out the next day.
avocado and banana popsicles
Aiden absolutely LOVED these! He gobbled one down and was able to hold his popsicle all by himself. So both the popsicle molds and this recipe are baby approved!
baby friendly popsicle recipe
Want a set of these Popsicle molds for FREE?! Head on over to 
my instagram for a chance to win yourself a set!

I was given these Fruitsicle Molds to review as part of the Nuby Parent Blogger Program, but all opinions are my own.

Monday, May 11, 2015

Mommy Meals Monday {Oven Baked Chicken Risotto}

Since becoming a Mom, cooking has become something I have let go. I mean in all honesty I've not cooked consistently since Aiden was born, oh 6 months ago. Sure I've made a meal here and there, but multiple nights in a row of quality home cooked meals...well that's not happening. My husband has been so understanding and so gracious, but it is time for me to get back on the wagon so I'm going to try to hold myself accountable in this space. I'm going to start a little series on meals that any Mommy {or busy woman} can make. I'm only going to post meals that are delicious, easy and quick. I figure if I have a plan I will do a better job of actually cooking. So here's my first recipe as part of my Mommy meals series.

This Oven Baked Chicken Risotto recipe is one that my friend Theresa shared with me. She made it for us during a difficult time and I am a firm believer in comfort food. This is real comfort food and it's easy.

Ingredients
-Cooked chicken breast (I usually bake 4 chicken breasts in the oven a day or two before compiling this meal to have this part done. I just coat with butter, add garlic and italian seasoning and bake for 30 minutes then chop up the chicken into small pieces.)
-4 Tbsp. butter
-5 cups Chicken Broth
-2 cups Arborio (short-grain) rice
-1 small onion (chopped)
-1 tsp. salt
-2 cups cherry or grape tomatoes (cut in half)
-16 oz. Mozzarella cheese (cut into 1/2 inch cubes)
-1/2 cup shredded basil (fresh is always best)

Instructions
-Preheat oven to 400 degrees and place butter in 9x13 dish in oven to melt.
-Once the butter has melted add the Chicken broth, diced onions and Arborio rice to the dish. 
-Stir ingredients together then cover the dish and place in the oven for 35 minutes. (Be careful transferring this into the oven....it is full of liquid and can spill easily. Take my word for it.)
-Fluff rice with a fork.
-Add remaining ingredients (chicken, tomatoes, mozzarella and basil)
-Serve warm

Original recipe can be found here (I doubled this recipe to fill a 9x13 dish)

Do you have a go-to recipe? I'd love to know what it is and try it out. Maybe I'll even feature it on a future Mommy Meals Monday!

Friday, March 20, 2015

Butterbeer {A Recipe}

How to make butter beer
I know, I know...I'm late to the Harry Potter party. Like way late, but it's okay because my husband and I are both sharing in all the joys of Harry Potter together. I read all the Harry Potter books while I was pregnant {read about that here} and my husband decided to start reading them shortly after Aiden came along. We were both new to the Harry Potter craze.

As Drew finishes each book, we watch the movie together and then talk about what they left out from the book. Haha. He just finished the 5th book and I decided we needed to make our Harry Potter movie nights a little more exciting by trying out a Butterbeer recipe. {Thanks Lauren for the inspiration and website!} I used this website and tested out recipe #5. We made the alcoholic version, but there are plenty of recipes on this site that are alcohol free. I haven't had the real stuff via Universal, but I enjoyed this drink immensely and so did my husband!
how to make butter beer
Ingredients: {Makes enough for 1 drink}
1 oz. Butterscotch Schnopps
1 oz. Vanilla Vodka
6 oz. Cream Soda {We used Jones}
Large Spoonful of Marshmallow Fluff

Instructions:
1.) In a tumbler mix ice, Butterscotch Schnopps, Vanilla Vodka and Cream soda
2.) Shake and Pour into a frozen mug
3.) Whisk together marshmallow fluff and a little splash of Butterscotch Schnopps
4.) Top drink with Marshmallow fluff concoction
5.) Cheers!
How to make your own Butterbeer
I'm so excited to compare this version to the REAL THING this summer. That's right...we have plans to take a day trip to Universal while we are in Florida this summer! Ah!

And did you know that Starbucks has a "secret" menu? I'm dying to try their Butterbeer Frappuccino!

Have you ever had Butterbeer?
Have you visited the Wizarding World of HP at Universal? {Give me tips!}
Did you know Starbucks had a secret menu?

Thursday, January 1, 2015

A simple recipe to kick off the NEW YEAR {French bread pizza}

It's tradition...whenever my friend Betsy comes to visit me or I her we make a Pioneer Woman recipe. She came to visit last week and we decided to make something simple and fast because well I have a 2 month old...enough said. I literally googled quick and easy Pioneer Woman recipes and found these French Bread pizzas. They were delicious and since everyone is probably tired after their New Year's eve celebrations, this is a perfect New Year's Day meal for one person or for many!

Ingredients:
Sub rolls (I actually used mini sub rolls)
Mozzarella cheese...the more the better
Marinara sauce
Any and all of your favorite pizza toppings (I used onions, mushrooms, Canadian bacon and pineapple)

Instructions:
This is the easiest "recipe" you'll ever follow...
1. Cut the rolls in half and place them face up on a baking sheet
2. Slice any toppings you may have that need slicing
3. Cover each roll with marinara sauce and mozzarella
4. Cover each roll with your toppings
5. Bake on the lowest rack of your oven for 375 to get the bread toasted then bump up your oven temperature to 425 and bake until cheese is melted and golden brown
6. Eat immediately

See...so easy!

What I love about these is that you can make them so many different ways...the possibilities are endless. Betsy and I ended up making a Hawaiian pizza and a caramelized onion and mushroom pizza. The onion and mushroom combination was my favorite! Just add butter to a sauce pan to soften the onions add the mushrooms and cook for about 10 minutes and add to your pizza. YUM!

Happy New Year everyone!

Tuesday, October 21, 2014

Apple Fritter Cake {Recipe}

You guys...this is truly the best fall dessert I have made to date. If you like apple fritters you will love this!

Ingredients:
For the filling-
2 heaping cups of sliced apples (I used Gala apples and it turned out amazing!)
1/3 cup sugar
1/4 teaspoon cinnamon
small pinch Nutmeg
2 Tablespoons cornstarch
2 teaspoons water

Plus-
1/2 cup brown sugar
1/2 teaspoon cinnamon

For the cake-
1/3 cup butter
3/4 cup sugar
1/2 cup Applesauce
1 teaspoon vanilla
2 eggs
2 and 1/4 cups flour
1 teaspoon baking powder
1 teaspoon baking soda
1 teaspoon salt
1 teaspoon cinnamon
1 cup sour cream

For the glaze-
2 cups powdered sugar
1 teaspoon vanilla
6 Tablespoons Milk


Instructions:
For the filling-
Combine apples, water, sugar, cinnamon and corn starch in a small sauce pan. Cook on low for 5-7 minutes stirring constantly until the apples are soft. Set aside to cool. While the filling is cooling, get a small bowl and combine the "plus ingredients" brown sugar and cinammon

For the cake-
Preheat the oven to 350 degrees. Grease and flour a 9x13 baking dish. Set aside. 
Cream softened butter and sugar until light and fluffy. Add applesauce and vanilla then the eggs one at a time. Then add the dry ingredients slowly: flour, baking powder, baking soda, salt, cinnamon and sour cream. Beat together until just combined.

Pour half the batter evenly onto the bottom of the greased and floured 9x13 baking dish. Then carefully spoon the cooled filling on top of the batter. Now sprinkle 2/3 of the brown sugar/cinnamon mixture on top of the filling. Cover with the remaining half of the batter. Sprinkle the top with the rest of the brown sugar/cinnamon mixture.

Bake for 45-55 minutes. Your kitchen should start to smell amazing and you will probably start drooling.

While your cake is baking, make the glaze.

For the glaze-
Mix the powdered sugar, vanilla and milk together. When the cake comes out, pour the glaze mixture over the warm cake. Spread evenly and allow to harden on top of the cake as it cools.

Now grab a fork and enjoy the best fall dessert of your life. I ate this for dessert then again for breakfast. It goes well with coffee.
Original recipe found here.

Monday, October 13, 2014

4 Fall Recipes You Need to Try!

I get so excited when the season starts to change over to Fall. It is definitely my favorite season to cook and bake. Cool temperatures, crisp air and so many fun flavors! I have made and loved all 4 of these fall recipes so I thought I'd share them with you.
Lentil Chili: This chili has become my husband's favorite. There is no meat in it, which I thought we would miss because we both love a good hardy chili, but we don't miss it at all. Just trust me when I say you need to make this! I always make it with a side of beer bread and use a pumpkin flavored beer.

Rachel Ray's Pumpkin Pasta: When I first read about using pumpkin flavoring in a pasta I was almost disgusted, but then the first day of fall rolled around and I decided now or never and made it. You guys, this is surprisingly delicious. I love the flavors of the pumpkin, sausage, sage and garlic together. Please don't miss out on the amazingness of pumpkin in your pasta!

Chef in Training's Pumpkin Chocolate Chip Pudding Cookies: These cookies have just the right amount of pumpkin in them. They are soft because of the instant pudding and are delicious! If you can't find the pumpkin pie spice instant pudding no worries...use plain vanilla instant pudding and add about a teaspoon of regular pumpkin pie spice. Problem solved!

Pioneer Woman's Apple Dumplings: This has to be my favorite fall dessert. I've made these too many times to count and everytime people ask me for the recipe. This recipe has a secret ingredient that I did NOT expect...Mountain Dew. Make these then thank me later!

What are your favorite fall recipes?

Monday, September 29, 2014

Tried and True Freezer Meals for New Moms {Part 2}

Today I'm sharing two more Tried & True Freezer meals: Goulash and Potato Soup. The ingredients for both these meals (not including the disposable tins) was $24.02 and both meals were delicious. First up...Goulash. I had never made or eaten Goulash before, but all the ingredients sounded great. It's basically Chef Boyardee for grown ups. Yum.

Goulash
Ingredients:
1 pound ground beef
1 can tomato soup
6 oz. can tomato paste
2 cups uncooked elbow macaroni
2 Tablespoon Italian Seasoning
1 can corn (15 oz.)
1 tsp. Garlic Powder
1 tsp. Onion Powder
2 cups shredded cheese

Instructions:
Brown Ground beef with onion powder and garlic powder. The smell from this is just amazing. Drain.
Cook noodles according to package directions, drain.
In a large bowl mix tomato soup, tomato paste, Italian Seasoning, noodles, corn and ground beef. Stir.
 Transfer to 9x9 disposable tin and top with cheese.
Cover dish with 2 layers of aluminum foil then label the dish with the following information making it easier when you get it out to bake later:
-Goulash
-Date assembled
-Cooking instructions: Thaw and Bake uncovered at 350 for 30-40 minutes

Next up, Potato Soup. The easiest of all the freezer meals I've made and one I will be making frequently both before and after baby comes.

Potato Soup
Ingredients:
30 oz. bag frozen, shredded hashbrowns
32 oz. container of Chicken broth
1 can cream of chicken soup
1/2 cup onion chopped
1/2 tsp. pepper
1/4 tsp. Garlic Powder
8 oz cream cheese (this will be added at the time you actually make the meal, but cream cheese lasts a long time so go ahead and buy it now if you want to make sure to have it when you make this meal!)

Instructions:
Double up a large freezer bag then combine all ingredients EXCEPT cream cheese. Label with the following:
-Potato soup
-Thaw soup and place in crock pot
-Cook on low for 6-8 hours or on high for 4-5 hours
-1 hour before serving add in cream cheese, allow to heat through until melted
-Garnish with cheese, bacon, green onions, sour cream

Click here for 2 more tried and true freezer meals!

Wednesday, September 10, 2014

Tried and True Freezer Meals for New Moms! {Part 1}

My October due date is quickly approaching so being the typical type A gal that I am I want to be as prepared as I can for when Aiden gets here. I knew one way I could help myself out later was by having some meals made that I could simply pull out of the freezer, thaw and bake.

I scoured Pinterest for freezer meals that weren't too complicated or too expensive. I didn't want to waste my time making freezer meals that wouldn't taste good so I went to my other girlfriends for advice. My friend Dori gave me her favorite freezer meal website that she had used when she was pregnant and here are two of the four freezer meals I ended up making. {I will share the other two in another blog post!}

The ingredients for these 2 freezer meals (aluminum foil and tins included) was $38.16, so less than 20 dollars for 2 delicious meals that serve 4-6 people each. I'd say that's a pretty good deal.

If you are going to do freezer meals I say make it fun. Have pregnant friends due around the same time as you? Make it a party! My girlfriend Theresa and I have due dates within a month of each other meaning the shelf life of our meals is perfect for both of us. We met at the grocery store, snatched up some Starbucks and hit the grocery aisles with our lists. We decided to make meals that involved chicken on the same day so we wouldn't have to cook/purchase chicken twice. The two meals I'll be sharing today are both from this website.

I would highly recommend shopping for and making these two meals together. I shopped for all the ingredients and made both meals within 2 hours, but in case you don't want to do that the ingredient lists and instructions are separate below.

Layered Enchilada Casserole
Ingredients:
2 cups cooked, shredded chicken (I used 2 chicken breasts that I bought from the butcher)
1 can diced tomatoes, drained (15 oz.)
1 can black beans, drained (15 oz.)
1 tub Sante Fe Blend Philadelphia Cooking Creme (if you can't find this at your grocery store you can substitute a tub of Philadelphia Spicy Jalapeno Cream Cheese)
2 cups Shredded Cheese (I mixed Mexican Cheddar Jack and Cheddar)
Flour Tortillas (you will use approximately 6-8)

Instructions:
Cook and shred chicken (I boiled my chicken for 10 minutes then shredded it in my Kichen Aide mixer)
Mix chicken with tomatoes, beans and cooking creme/cream cheese in a bowl
Place 1/3 of the mixture on the bottom of a 9x9 disposable tin
Top chicken mixture with a flour tortilla
Top tortilla with more of the chicken mixture and cheese
Repeat layers and end with chicken mixture on top and top with remaining cheese
Double wrap with aluminum foil
Label your meal in permanent marker. I put the name of the meal and instructions for when I'm ready to cook it so I wouldn't have to look back at the recipe
This meal is now ready to freeze. When you want to eat it thaw and bake uncovered at 350 degrees for 30 minutes. So easy!

Chicken and Wild Rice
Ingredients:
1 box wild rice with seasoning packet (4.3 oz.)
1 can cream of mushroom soup
1 can cream of chicken soup
1 can water (yes can...use an empty soup can and fill it with water)
1 small can mushrooms, drained
4 boneless skinless chicken breast (uncooked)
1 cup slivered almonds

Instructions:
Mix together rice with seasoning packet, both cans of soup, and water. Stir in mushrooms.
Pour into 9x9 disposable tin and top with 4 chicken breasts
Sprinkle slivered almonds overtop chicken breasts
Double wrap with aluminum foil
Label your meal in permanent marker. I put the name of the meal and instructions for when I'm ready to cook it so I wouldn't have to look back at the recipe
This meal is now ready to freeze. When you want to eat it thaw and bake uncovered at 350 degrees for 60 minutes. (If your chicken breasts are thick I recommend baking this meal at 400 for an hour and a half instead or if you do cook it at 350 for an hour make sure to check that the chicken is cooked through all the way!)

I tested both meals out to make sure I liked them and both meals are delicious and easy to prepare on any regular night or to freeze and eat later! Do any of you have any other meals that are good to freeze and eat later? Please share!

{See this post for a few more Tried and True Freezer Meals!}

Monday, August 18, 2014

Husband approved meal {Shepherd's Pie}

It has been 2 months since I posted a recipe, which gives you an idea of just how much cooking has been going on around here these days. I've cooked here and there, but lately I'd rather be lying on the couch reading a book about babies or doing a nursery project than spend my time on my feet sweating in the kitchen. #sorryhusband
 
Well I learned the other day that one of my husband's favorite meals is one I had never ever cooked him and I started feeling guilty. The night before my husband's first day back at school I decided to make it up to him and finally make him Shepherd's pie. I turned to PW for help because I thought surely she'd have a wonderful Shepherd's pie, but I couldn't find one so I turned to Paula Deen's and friends she did not let me down.

My mom never made Shepherd's Pie growing up so I didn't know what to look for in a recipe, but I just assumed Paula Deen would know. So here's her recipe and let me just say that this Shepherd's pie is husband approved and now in my meal planning binder to be made again.

Ingredients:
1 small onion chopped
1 1/2 pounds ground beef
2 (8-ounce) cans tomato sauce
1 1/2 cups mixed vegetables (I used frozen vegetables that I thawed in the refrigerator beforehand)
Salt and freshly ground black pepper
8 to 10 medium red new potatoes peeled and sliced
1 1/2 cups milk
12 tablespoons butter
1/2 cup sour cream
2 cups instant biscuit mix (I used Bisquick)


Instructions:
Beef Layer: Saute onions in 2 tablespoons butter. Add ground beef. After beef is browned, add tomato sauce; Mix in vegetables. Add salt and pepper, to taste.

Potato Layer: Peel and slice potatoes 1/4-inch thick. Cook in boiling water for approximately 15 minutes or until fork-tender. Whip potatoes with electric mixer; mix until moderately smooth. Don't over beat them; a few lumps are nice. Add 1/2 cup heated milk, 1/2 cup butter, and sour cream. Salt and pepper, to taste. Whip until mixed. Adjust thickness by adding more milk, if desired.

Biscuit Layer: Combine biscuit mix and 1 cup milk. The mix should be thinner than normal biscuit mix but not runny.

Preheat oven to 350 degrees F

Spray a 9x13 or any similar casserole dish. Layer half way up with the mashed potatoes. Next, spread a layer of the meat and mixed vegetables. Pour biscuit mix over meat and veggies. Melt 4 tablespoons of butter and drizzle over top. Bake for approximately 35 to 45 minutes until top is golden brown.

Original recipe found here

Thursday, June 5, 2014

Pioneer Woman's Pancetta Pasta with Leeks

Here's the proof that I actually did cook once or twice during my first and second trimesters...

The first time I ever cooked with leeks was using another Pioneer Woman recipe and the first time I used them, I used them completely wrong. Now that I know how to use them I love them so when I saw another one of PW's recipes with leeks I was sold.

What you need:
12 oz. bow tie pasta
3 oz. chopped Pancetta (or thinly sliced bacon)
3 whole leeks, thinly sliced
1 Tablespoon butter
1/2 cup Dry White Wine
1/2 cup Heavy Whipping Cream
Shaved Parmesan cheese
Salt and Pepper to taste

Steps:
Cook pasta and set aside (reserve 1/2 cup pasta water in case needed later)

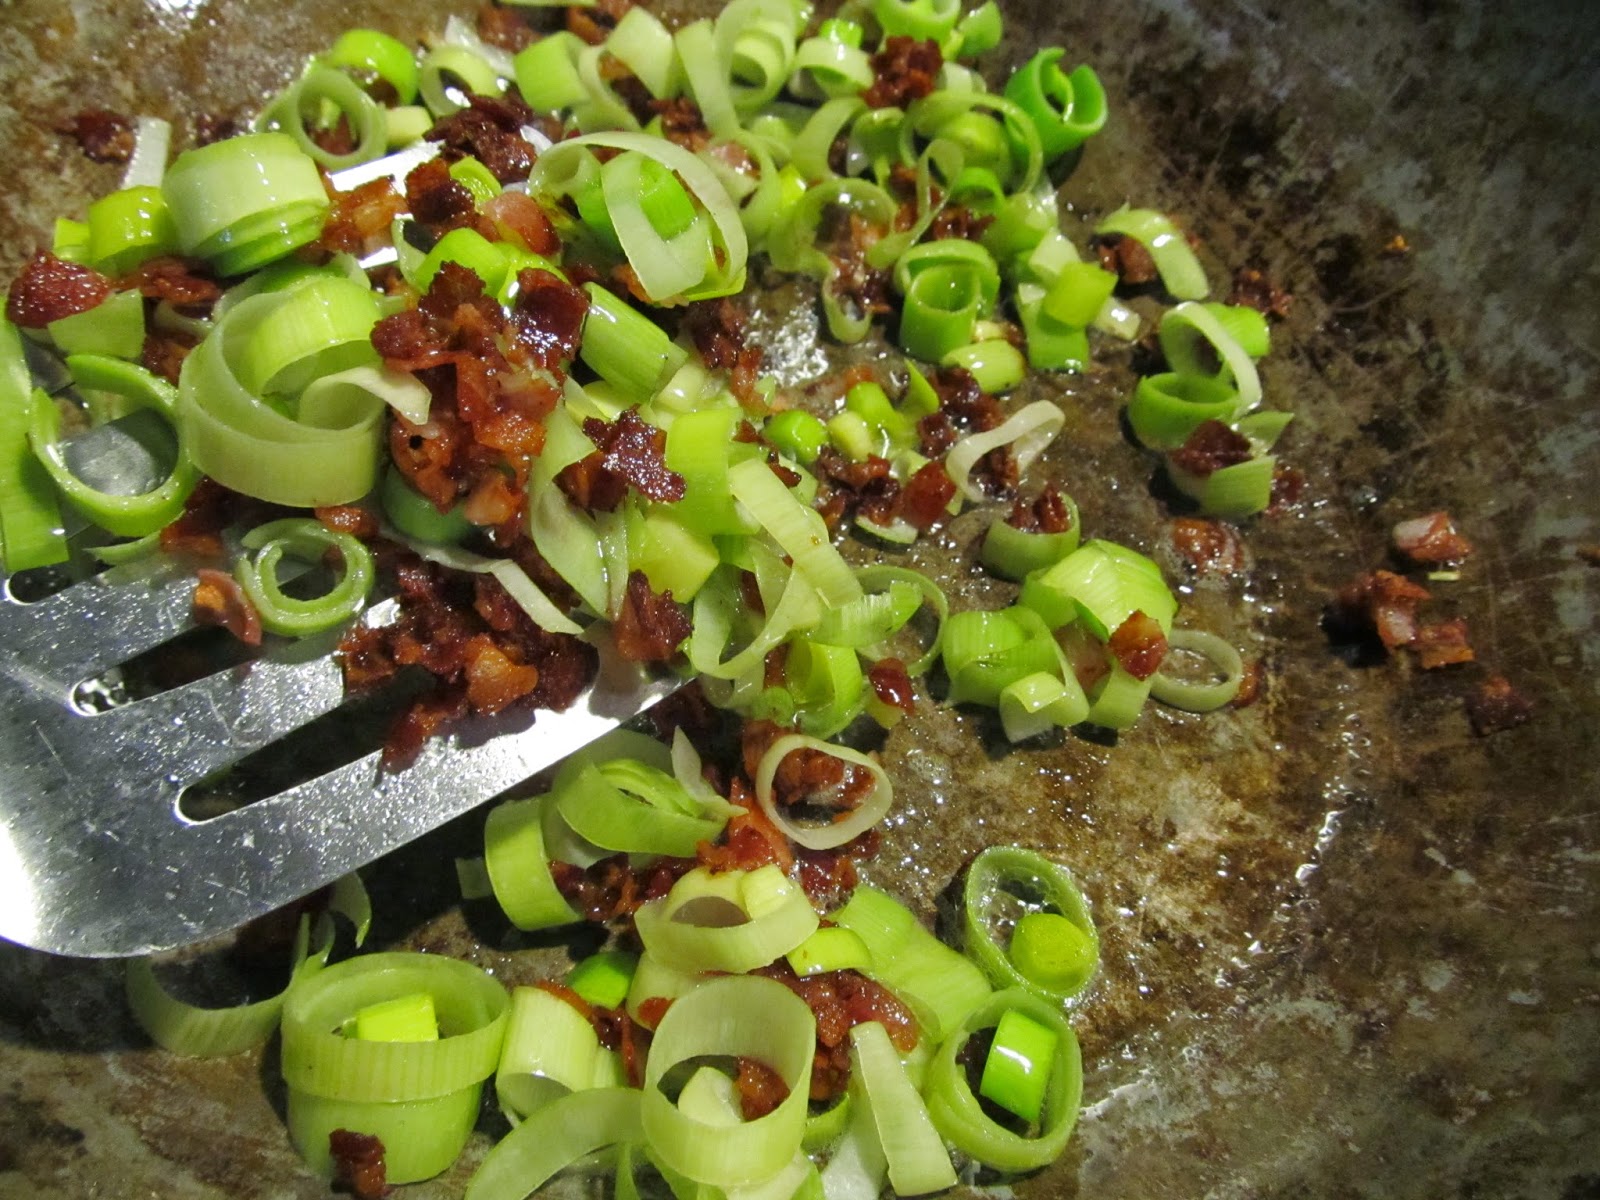
Saute the chopped pancetta until it starts to brown then add the sliced leeks and butter and cook for 8 minutes
After pancetta and leeks have cooked for 8-10 minutes add the white wine and cook 1-2 minutes

Reduce heat to low then add in the heavy whipping cream

Stir in salt and pepper and parmesan

Toss these ingredients in with the cooked pasta adding a little pasta water if needed
Top with Parmesan and eat warm! Yum!

Original recipe found here!

Friday, May 30, 2014

Raspberry Crisp (The perfect dessert)

You guys, I found the most delicious and easy spring/summer dessert. It is by none other than THE Pioneer Woman herself! I promise this is one of those recipes you will want to pin and make over and over again.

What you need for the berry mixture:
2 1/2 cups fresh raspberries
1 Tablespoon Cornstarch
2/3 cup sugar
1 tsp. Vanilla extract

What you need for the topping:
1 cup flour
1/4 cup sugar
1/4 cup brown sugar
1/3 cup oats
1/4 cup chopped Pecans
Dash of Salt
3/4 sticks butter cut into small pieces
Vanilla ice cream

Steps:
Start by preheating the oven to 350 degrees

Make berry mixture by combining rinsed raspberries, corn starch, 2/3 cups sugar and vanilla in a medium sized bowl. Stir and set aside.
In another bowl combine flour, 1/4 cup sugar, brown sugar, oats, pecans, salt and butter pieces, which will be used for the top of the crisp. Use a pastry cutter to mix ingredients until it is crumbly.
Add the berry mixture to a small pie pan. Sprinkle the crisp topping all over the top until covered evenly.
Bake 25-30 minutes until topping is golden brown. Let dish sit for 10 minutes to cool before serving. Serve warm with vanilla ice cream. Mmmmm.
For the original recipe, click here!